

Using These Slides
A tour of the lecture format
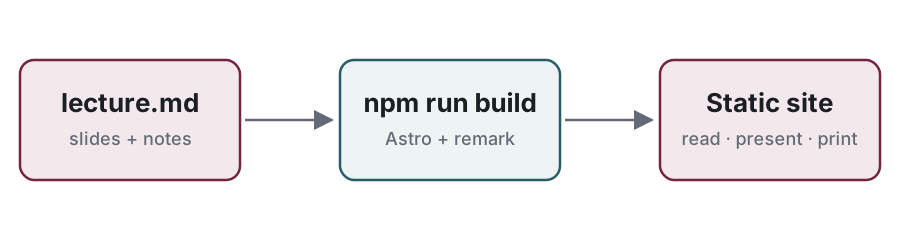
Every lecture on this site is one Markdown file. The same file gives you three things:
- a slide deck you can present full screen,
- a reading view where each slide sits next to notes like these, and
- a printable handout (just print the page).
This lecture is a working demo of the format. Open
src/content/lectures/00-using-these-slides.md next to it to see how each
slide is written.
Three ways to use a lecture
Read
Scroll through slides and notes. Switch between stacked, side by side and grid in the toolbar.
Present
Press P to present from the slide in view. Esc brings you back to the same place in the page.
Presenter view
Press S for a second window with notes, the next slide and a timer. Both windows stay in sync.
The reading view and the presentation are the same page. Scrolling keeps track of which slide is in view, so Present always starts where you are, and leaving the presentation scrolls the page to wherever you stopped.
A typical setup in class: the audience window is full screen on the projector, and the presenter view is on the laptop screen. A clicker that sends Page Up / Page Down or arrow keys works in either window.
Writing a slide
## Slide title

- Bullet points, **bold**, `code`, links...

:::notes
Notes for students: shown under the slide when
reading and in the presenter view.
:::

---

## The next slide
Slides are separated by a line containing only ---. Everything up to the
next --- belongs to one slide, including its notes.
:::notes…:::holds the student-facing notes for that slide.:::speaker…:::holds notes only you see.- The first heading on a slide becomes its title in the slide list.
Revealing things step by step
- Wrap content in
:::stepsand its items appear one at a time - Each press of → or Space reveals the next item
- Going back hides them again
- In the reading view everything is visible
Inside :::steps, each list item is a step. Other blocks inside it (a
paragraph, a code block, a callout) are a step each. You can also add
{.step} to any directive, for example :::callout{.step}, to make that one
block appear on its own.
In presenter view, steps that aren’t shown yet are dimmed, and the next one is outlined.
Building blocks
Code, math, columns, callouts, images
A section slide (::slide{.section}) marks the start of a new part of the
lecture. It shows up in bold in the slide list on the left.
Code
def binary_search(xs, target):
    lo, hi = 0, len(xs) - 1
    while lo <= hi:
        mid = (lo + hi) // 2
        if xs[mid] == target:
            return mid
        if xs[mid] < target:
            lo = mid + 1
        else:
            hi = mid - 1
    return -1
Code blocks are highlighted at build time, so they look right without JavaScript and work offline. The slide’s code colours follow the slide theme; code in the notes follows the site’s light/dark mode:
print(binary_search([1, 3, 5, 7], 5)) # 2Keep slide code short. About 12–14 lines fit comfortably. Use
::slide{.dense} for a bit more room.
Math
The running time satisfies
T(n)=T(2n)+O(1)⟹T(n)=O(logn)Inline math works too: ∑i=1ni=2n(n+1).
Math uses LaTeX between $…$ (inline) or $$…$$ (display) and is rendered
with KaTeX at build time.
Columns and callouts
::::columnsholds two or more blocks; each one is a column- Add
.wide-leftor.wide-rightfor a 60/40 split - Add
.middleto centre them vertically
The outer block needs more colons than the blocks inside it.
Close every block with the same number of colons it opened with.
Each block directly inside ::::columns is one column. Use :::column to
group several things (a heading and a list, say) into one column. Nesting
three levels deep needs five, four and three colons, so keep it shallow.
Any :::name block becomes an HTML <div class="name">, so a new building
block is just a CSS rule (add your own file with the customCss option).
Ones already styled:
columns/column, steps, callout (and callout{.warn}), center,
fill (fills the remaining space, good for a diagram), bottom, muted,
big.
Images and diagrams
Put images next to the lecture in src/content/lectures/images/ and link to
them with a relative path. Wrapping an image in :::fill makes it use all the
space left on the slide.
Alt text matters: it’s what screen readers announce and what shows if the image fails to load.
One line at the top of a slide changes its whole layout. This one is a statement.
Layouts: title, section, center, statement, dense, xdense,
big-text, image.
Set a layout with ::slide{.name} on the first line of the slide. You can
combine them, for example ::slide{.center .dense}, and add .no-footer to
hide the slide number.
Notes-only sections
This block has notes but no slide. It appears in the reading view (and the handout) but is skipped while presenting. Use it for readings, longer derivations, or anything that is better read than shown.
To make one, write a :::notes block on its own between two --- lines.
Keyboard shortcuts
| Key | Action |
|---|---|
| P / Esc | Start / stop presenting |
| S | Presenter view |
| → ← | Next / previous step |
| ↓ ↑ | Next / previous slide |
| F / B | Full screen / black screen |
| 12 Enter | Go to slide 12 |
| ? | All shortcuts |
While reading: 1 2 3 switch layout, J / K jump between slides, and N shows speaker notes inline.
Questions?
Next: add your first lecture by copying the lecture template from the package’s templates/ folder